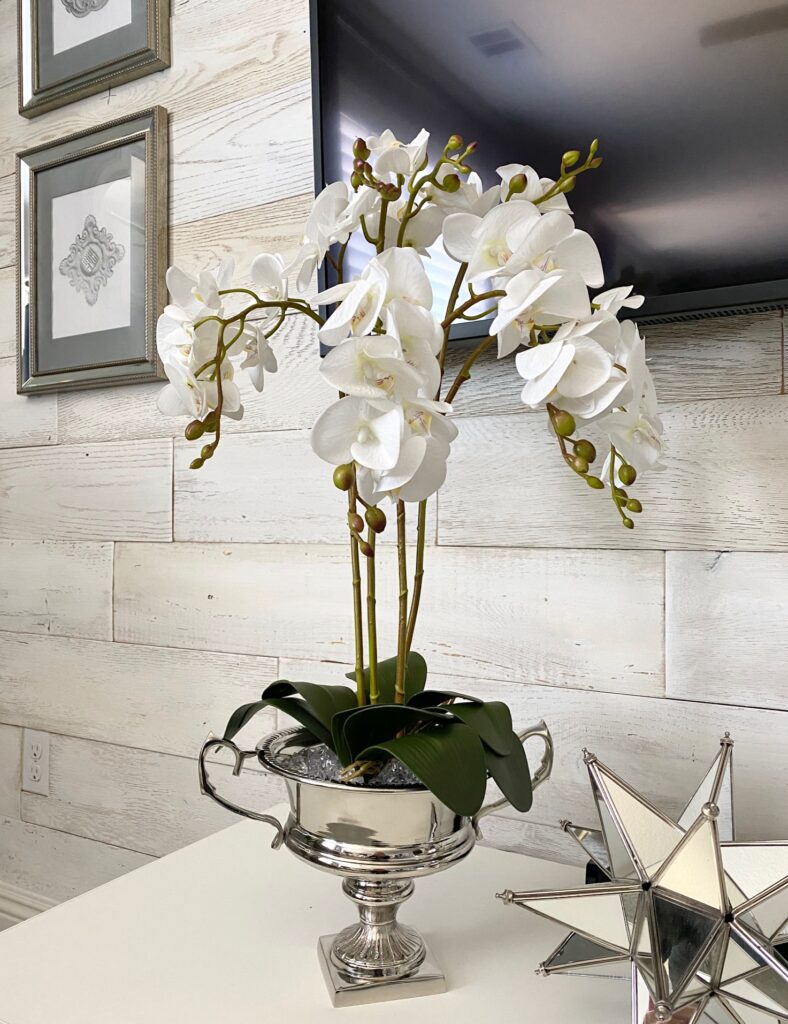
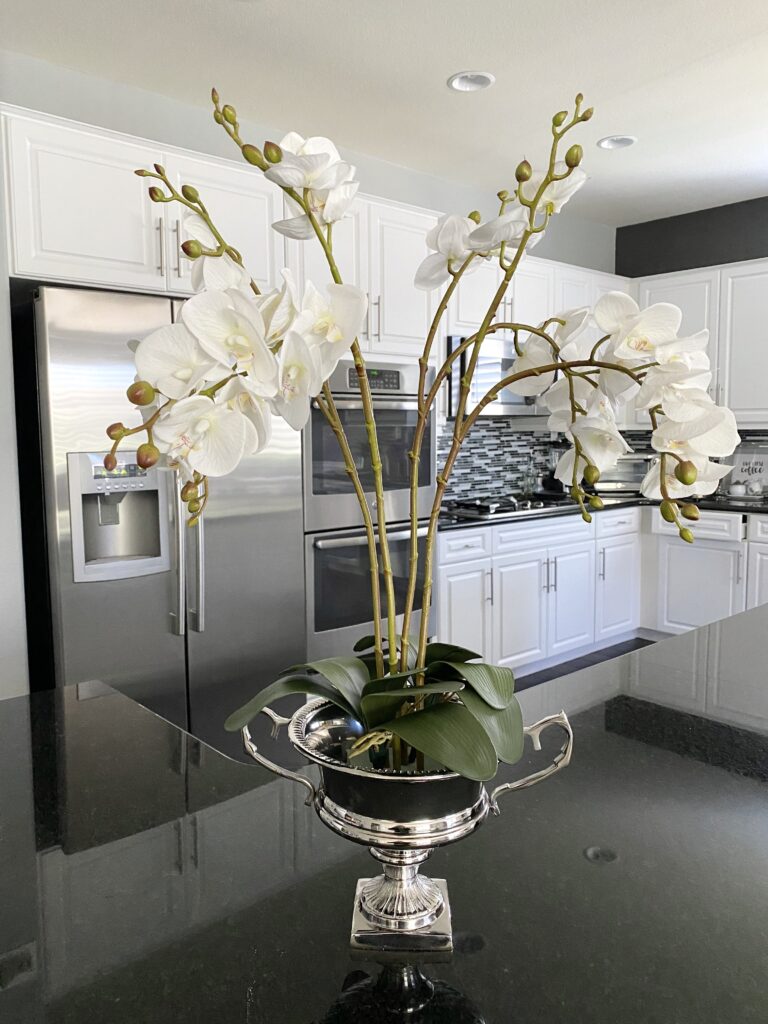
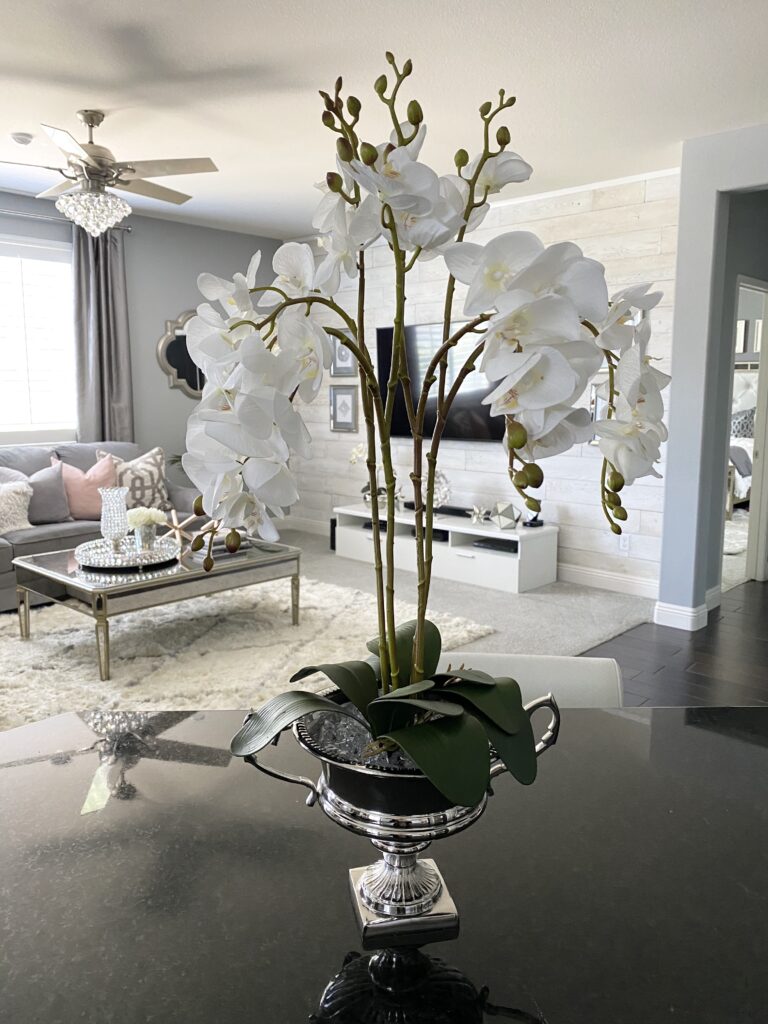
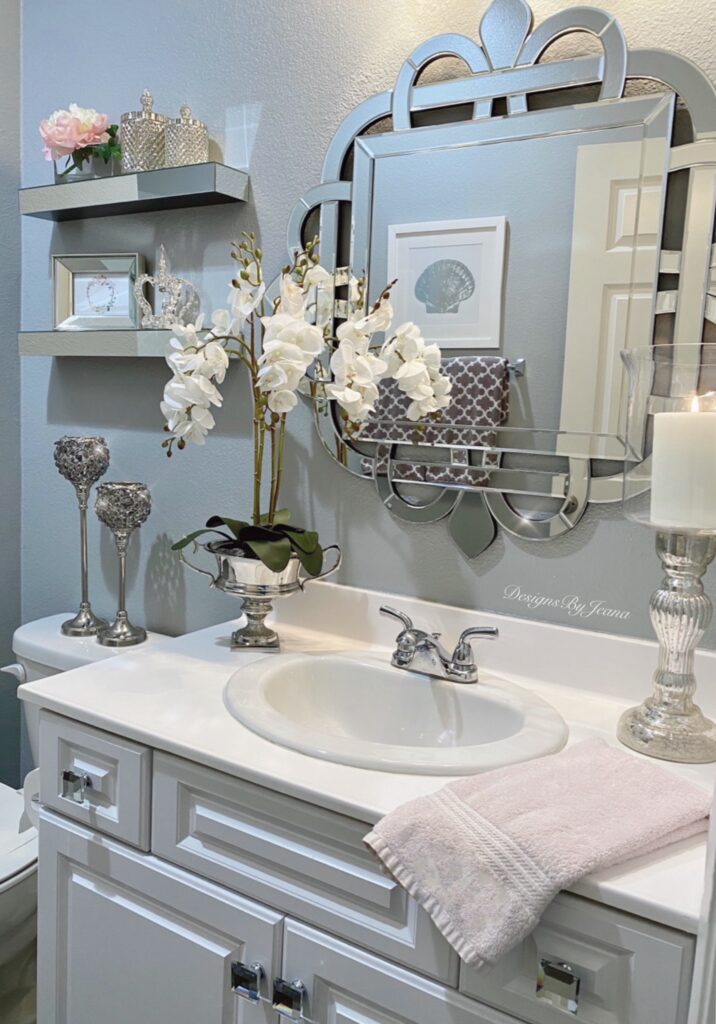
If you know me, you know I love the look of beautiful orchids. I have several faux orchid arrangements decorating different rooms in my home. It is not easy to find large, beautiful arrangements online for a decent price. When I have searched, I found that really nice-looking ones in pretty vases/pots usually cost well over $100. That is why I decided to try and create my own DIY faux orchid arrangement for less. This is one of the easiest DIY projects I have ever done. It only took me about 5 – 10 minutes to complete and I really love how it turned out!
What You’ll Need
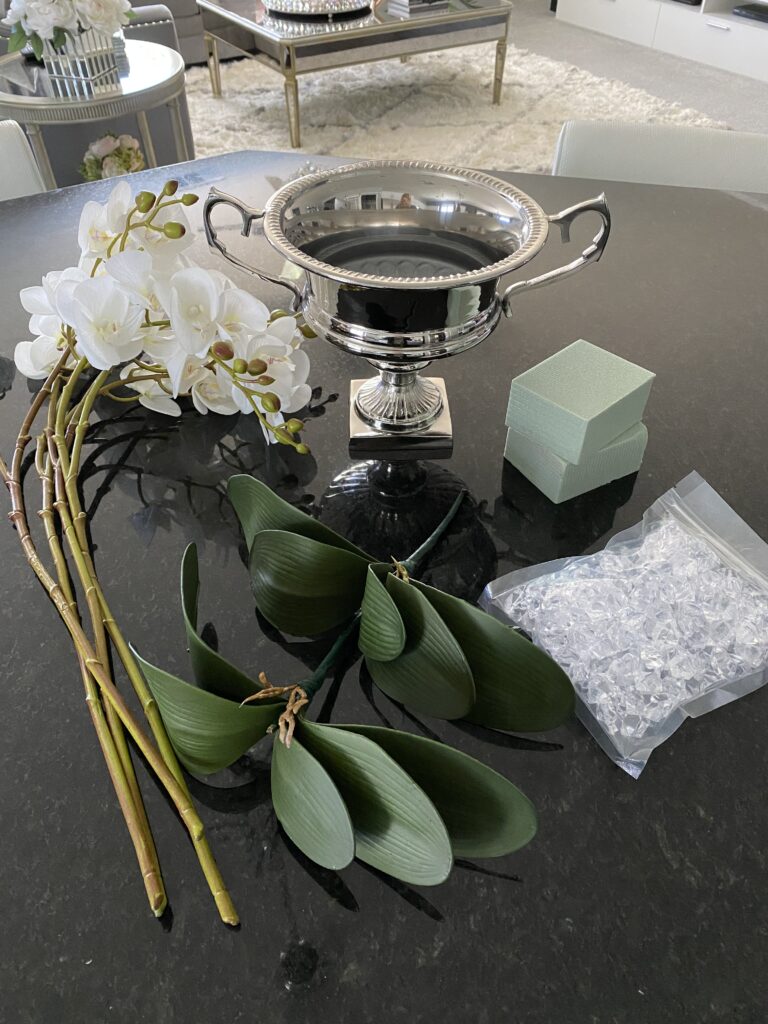
I have linked all of the supplies I used in creating this arrangement. You can click on the image above to shop each item separately.
- Silver Urn
- 4 Faux Orchid Stems
- 2 Faux Orchid Leaves
- Floral Styrofoam
- Clear Decorative Gems
- Glue Gun
Step 1
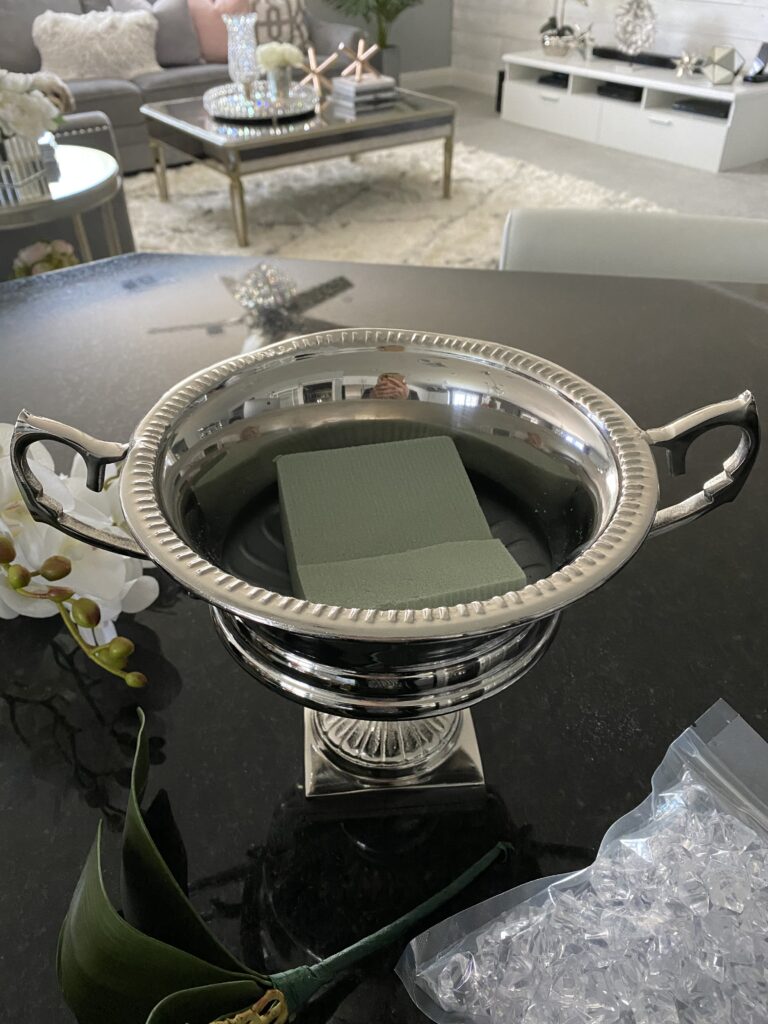
First, I cut the floral styrofoam to fit in the bottom of the urn. I used my hot glue gun to glue the styrofoam down.
Step 2
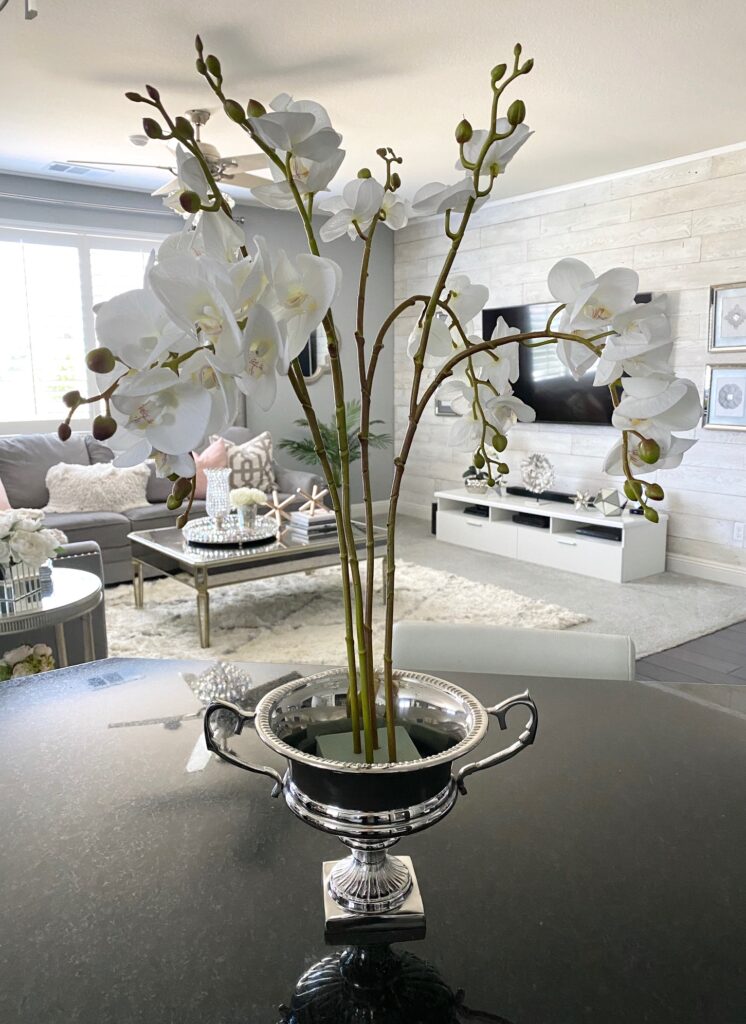
Next, I stuck the stems in the center area of the styrofoam. I didn’t hot glue them in, but that is an option if you want to ensure they stay in place more permanently.
Step 3
Then, I added two of the faux orchid leaves. I placed them on opposite sides of the stems. Again, these can be glued down with the hot glue gun to hold them in place a little better.
Step 4
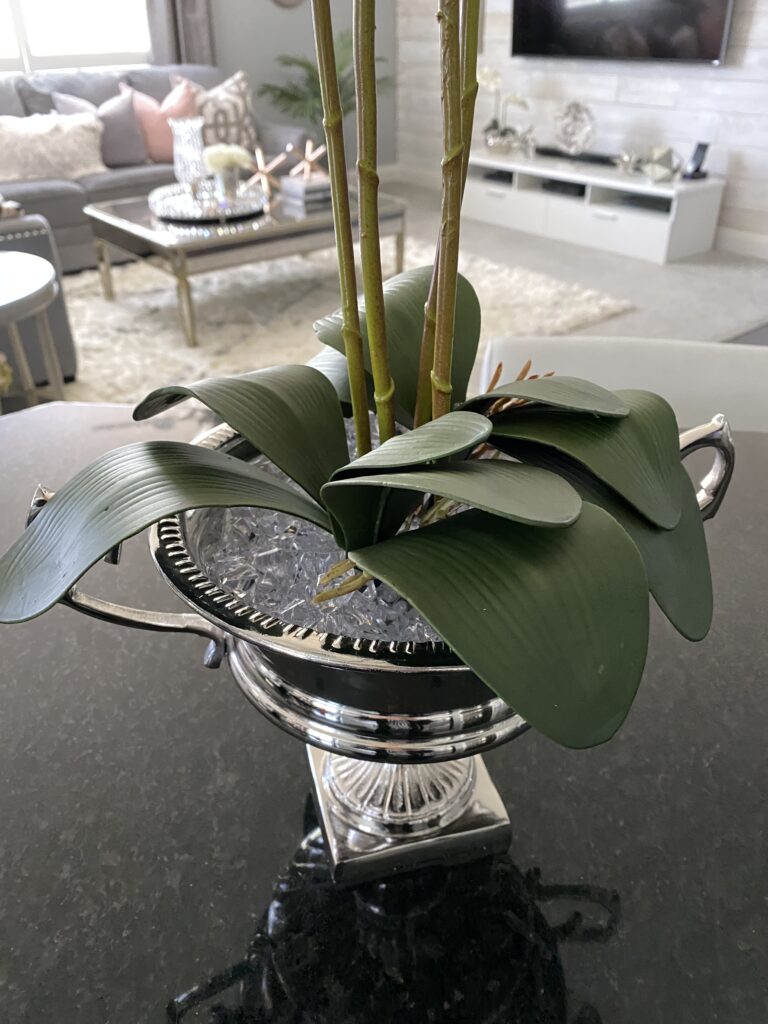
Once I had the leaves in place, I added clear decorative gems to cover the empty spaces on the inside of the urn. You could also use other pretty decorative stones or moss if you prefer that instead.
Step 5
Finally, I adjusted the orchid stems to my liking and voila! That was it!
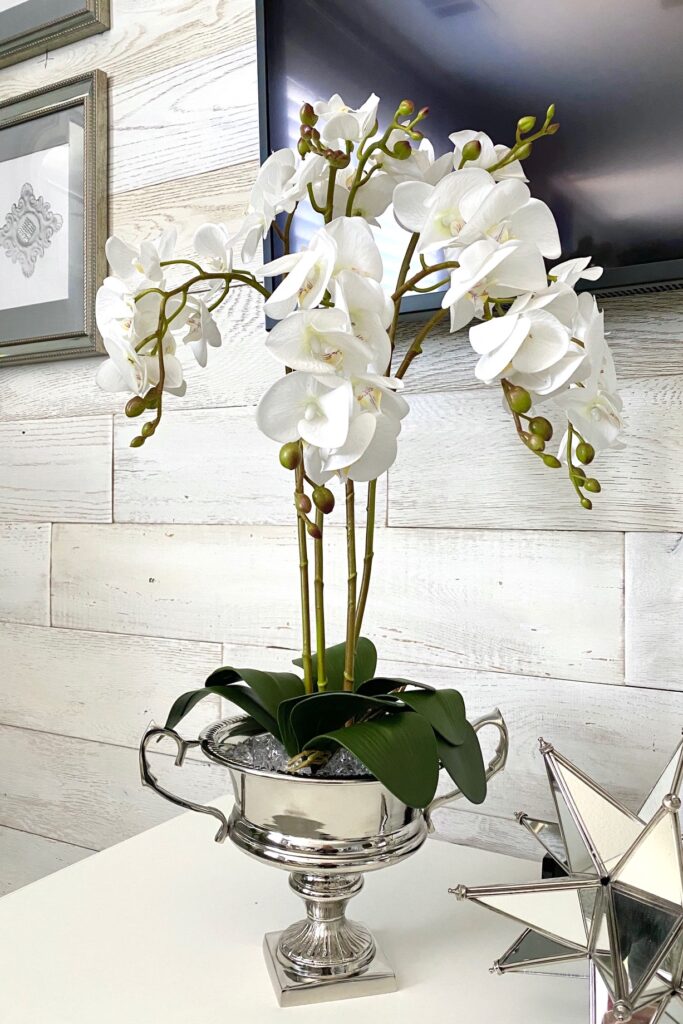
I love that this arrangement is such a versatile piece that will look good in any room in my home! If you decide to try this DIY, I’d love to see it! Please tag me on IG or DM your pics so I can share.
Shoppable Faux Orchid Arrangements
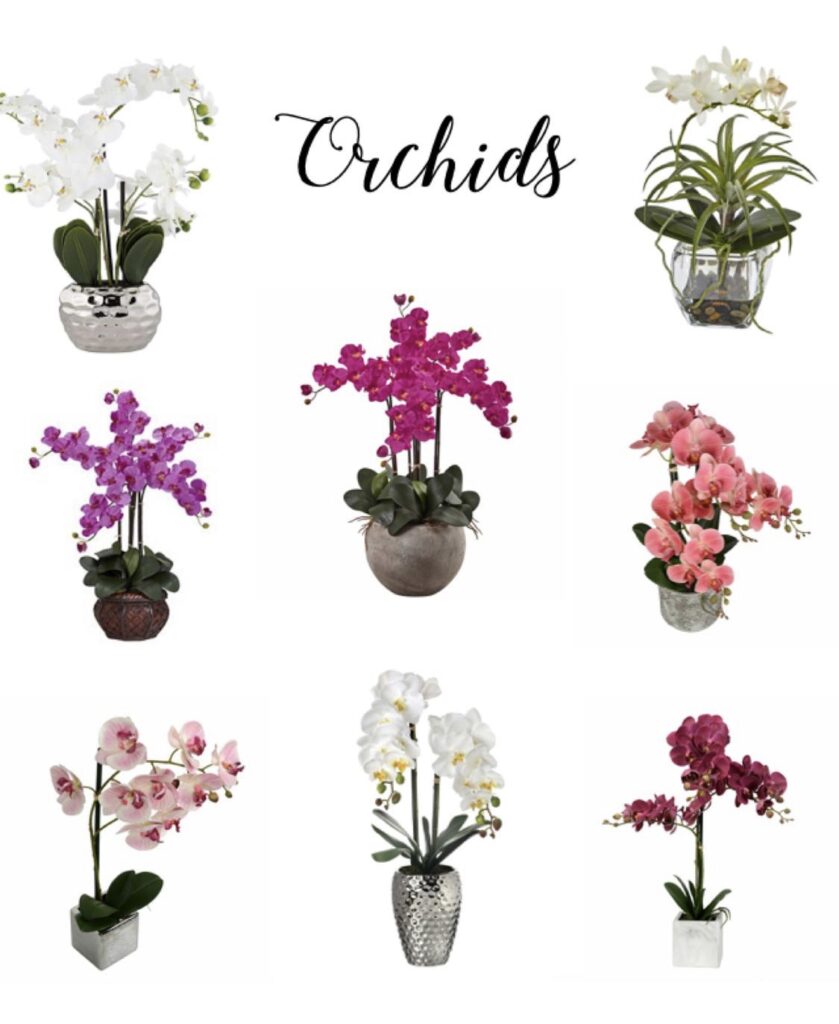
If you are looking for faux orchid plants, but are not the DIY type, I have linked a few that you can shop online. Just click on the image above for links.


Laurie says
Thank you for posting this.
shelovestodecorate says
You are welcome! Hope you enjoyed!